Apr 23, 2009

Render Settings and the Paint Pipeline


This is the image I rendered using surface shaders. The whole image was rendered out, taken into photoshop and painted on. That was then sent back into Maya and then rendered again. Default shading sampling of 2 to 8 samples, and multipixel filter.
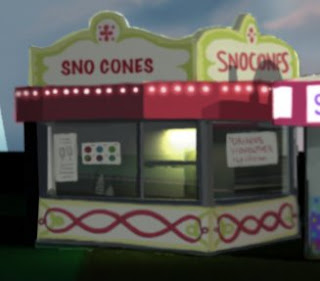


Multipixel filter, shading rate of 1 sample per pixel.
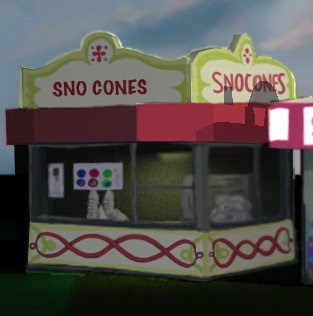


Lambert rendered with no multipixel filter and shading samples at 1.
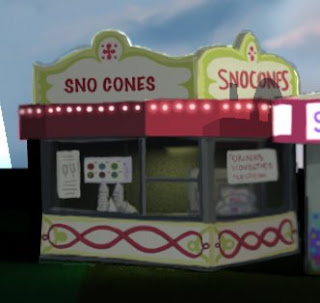

Surface shader, no filter and shading samples at 1, render used as background. This is to show if there is any loss when an image created with no filter is used again in the render.
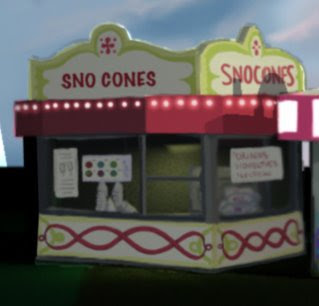

This is the image with multipixel filtering, after I have gone back and made sure when I iterate in photoshop, that I retain the crispness of my painted image.

Basically, regardless of how the image is ultimately rendered, when working in the paint pipeline, it is important to render images that will be taken into photohop as crisply as possible, so as to lessen the degradation of the image as it is bounced back and forth in the lighting stage. When rendering for use in photoshop, do not use multipixel filtering, and set shading sampling to 1 per pixel. Final render can use multipixel filtering.

Apr 8, 2009

Face to The Face Machine Test

So its kind of coming down to the fact that I know very little about rigging a face, so I am looking for people have done already for me.  I went to anzovin studios website and download the demo face for the Face Machine.  So without retracking another video(steve and i are having ftp server issues) I just linked some points up from my last track to a scaled up Face Machine Face.  I feel like this has the most potential so far.


A Facial Rig Video

So I found this facial rig video on youtube that does not look like it uses blendshapes.  Of course there is no tutorial so I have no idea how they do it but I imagine ours being similar


Apr 6, 2009

boujou Tracking

So the automatic tracking in Boujou is pretty good but not perfect. It is great for attempting to track everything and anything in the frame (or the mask field) by attempting tons of points. The problem occurs when most of these points only track for a few frames. A movie, 600 frames in length would have about 19000 tracked points. One way to mend this is to stitch tracks together. If you are attempting to track a specific point, chances are that it has been tracked for 95% of the movie. There are multiple tracks that make up the complete path of the track, and it is quite easy but a little time consuming to stitch tracks together. Though time consuming, these composite tracks are now regarded as more accurate than the other ones, so you can track the features again more accurately once you have composited tracks.

But how can we use these points?

There are 3 ways to export usable data from Boujou.
First, Export Feature Tracks: creates a .txt file that has, for each track_id, what frame it is active and its X and Y position. here is some sample data:

# track_id view x y
auto_18604 0 656.968 25.4732
auto_18604 1 669.579 16.3805
auto_18604 2 671.129 15.7436
auto_18604 3 671.787 16.1741
auto_18605 0 213.145 193.769
auto_18605 1 213.142 194.029
auto_18605 2 212.903 194.239
auto_18605 3 215.941 197.151

above are the tracks for points "auto_18604" and "auto_18605". Both are visible in frames 0, 1, 2, and 3. For each of those frames, there is the x and y position.

This method can also export the data for manually placed locators that track user defined points.


Method #2, Export Camera Solve:
even if you want 2D data, not 3D, you could run a camera solve so that the points it generates will last throughout the entire duration of the clip. You will not lose any work you put into the feature tracks (such as if you joined tracks together for a more accurate and longer solve) because these "gold tracks" heavily influence the camera solve it puts out.
Another plus about Exporting a camera solve is that it can be exported as a .ma file to import directly into Maya.

Method #3, Export Tracks to Shake:
This process will simply take all of your Feature Tracks (target tracks and locators as well if you have them) and export into shake as simple 2D movement. I haven’t explored this option fully yet but think it has potential.

Apr 4, 2009

Reference Images

I found a gazillion reference pictures for the fairground. Most of them have similar lighting (cloudy sky around dusk with lights from the rides) but they vary enough that we should probably pick just one or two to work from, I just wasn't sure which. I put them all in a folder called "Reference Images" in group storage. And there are even more here: http://www.flickr.com/photos/10thavenue/sets/617252/

And here are a few from the folder that I thought might work well.


Apr 1, 2009

Steve's Face to Woody Rig Unweighted

Besides a few points that didnt track well, everything seemed to work pretty well.  There are some pecular things though.  The track points eventually seem to be behind the movement on Steve's face.  Like the points do the movement but moments later than they should.  No idea what is causing this.  Steve also has way more dots on his, but I don't know if tracking all of them is needed.